🔥 @Cacheable, @CachePut, @CacheEvict 어노테이션의 사용법을 알아보고, 데이터 조회 결과를 캐싱해보자!
중요❗ 헷갈릴수 있으므로 꼭 노션의 코드와 비교하며 읽도록 하자!
[ 설정 확인 ]
- 우분투 도커에서 Redis 실행 확인
docker ps

- build.gradle

dependencies {
    // jpa
    implementation 'org.springframework.boot:spring-boot-starter-data-jpa'
    // redis
    implementation 'org.springframework.boot:spring-boot-starter-data-redis'
    implementation 'org.springframework.boot:spring-boot-starter-web'
    compileOnly 'org.projectlombok:lombok'
    runtimeOnly 'com.h2database:h2'
    annotationProcessor 'org.projectlombok:lombok'
    testImplementation 'org.springframework.boot:spring-boot-starter-test'
    testRuntimeOnly 'org.junit.platform:junit-platform-launcher'
}- application.yml
spring:
  data:
    redis:
      host: localhost
      port: 6379
      username: default
      password: systempass

  datasource:
    url: jdbc:h2:mem:test;
    driver-class-name: org.h2.Driver
  jpa:
    hibernate:
      ddl-auto: create
    defer-datasource-initialization: true
    show-sql: true

  sql:
    init:
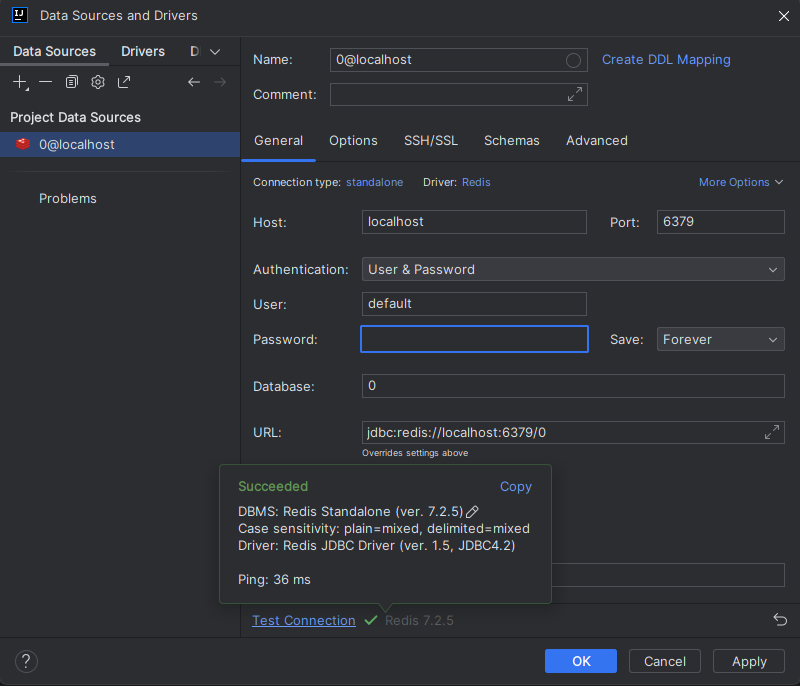
mode: always- Intellij IDEA UE에서 연결


[ CacheConfig ]
RedisCacheManager를 만들어 Bean으로 등록해 주기
@Configuration
@EnableCaching // 캐싱 기능을 활성화하기 위해 사용되는 어노테이션
public class CacheConfig {
  // CacheManager의 구현체를 만들어서 빈으로 공급해줘야지 스프링 부트가 빈 객체를 사용하여 캐싱을 구성

  @Bean // Redis를 사용하는 CacheManager
  public RedisCacheManager cacheManager(
          RedisConnectionFactory redisConnectionFactory
  ) {
    // 설정 구성을 먼저 진행한다
    // Redis를 이용해서 Spring Cache를 사용할 때, Redis 관련 설정을 모아두는 클래스
    RedisCacheConfiguration configuration = RedisCacheConfiguration
            // Redis를 사용하여 캐시를 설정할 때 기본 설정을 반환하는 메서드
            .defaultCacheConfig()
            // 결과가 null이면 캐싱하지 않는다
            .disableCachingNullValues()
            // 기본 캐시 유지 시간을 유지 / Ttl(Time To Live)
            .entryTtl(Duration.ofSeconds(120))
            // 캐시를 구분하는 접두사 설정 / 캐시를할 때 캐시의 데이터가 Redis에 들어갈 때 키의 모습
            .computePrefixWith(CacheKeyPrefix.simple())
            // Redis 캐시에 저장할 값을 어떻게 직렬화/역직렬화 할것인지
            .serializeValuesWith(
                    // RedisSerializationContext.SerializationPair.fromSerializer(RedisSerializer.java())
                    SerializationPair.fromSerializer(RedisSerializer.java())
            );

    // configuration 을 사용하는 RedisCacheManager 만들고 반환
    return RedisCacheManager
            .builder(redisConnectionFactory)
            .cacheDefaults(configuration)
            .build();
  }

}- @EnableCaching 어노테이션을 바탕으로 메서드의 결과를 캐싱할 수 있습니다.
- 대표적인 어노테이션으로 @Cacheable, @CachePut, @CacheEvict가 있습니다.
[ Dto 설정 ]
Redis를 사용할 때 Serializable 인터페이스를 구현하는 이유는 직렬화, 역직렬화 하기 위해
즉, ItemDto 클래스에 Serializable 를 구현함으로써, ItemDto의 인스턴스를 Redis에 저장할 때 자동으로 직렬화됩니다.
public class ItemDto implements Serializable {
    private Long id;
    private String name;
    private String description;
    private Integer price;
}
[ @Cacheable ]
- readAll 메서드에 @Cacheable 추가하기
@Cacheable(cacheNames = "itemAllCache", key = "methodName")
public List<ItemDto> readAll() {
    return itemRepository.findAll()
            .stream()
            .map(ItemDto::fromEntity)
            .toList();
}- cacheNames: Spring 내부에서 캐시를 구분하기 위해 붙여주는 이름입니다.
- key: 데이터를 구분하기 위해 사용할 값을 지정합니다. 인자가 없으므로 메서드의 이름은 readAll을 받아옵니다.
[ 조회 요청 보내기 ]
- Postman을 사용하여 조회 요청 보내기

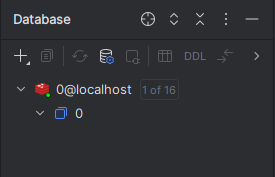
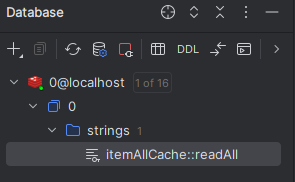
- Redis 캐시 확인

- @Cacheable이 포함되게 되면 CacheConfig에서 설정한데로 캐싱 어노테이션이 동작합니다.
- 전달된 인자가 동일한 호출에 대하여 캐시에서 데이터를 돌려주는 Cache Aside 방식의 캐싱이 사용됩니다.
- 처음으로 메서드를 실행하면 DB에서 결과를 가져오지만 해당 반환값을 캐시에 저장하고, 이후 캐시가 삭제되기 전까진 캐시에서 데이터를 반환합니다.
[ 로그 확인 ]
Cache Aside 방식을 사용함으로 처음 한 번은 SQL Query(select)가 실행됩니다.
Hibernate: select i1_0.id,i1_0.description,i1_0.name,i1_0.price from item i1_0
- CacheConfig에서 설정한 .entryTtl(Duration.ofSeconds(120))에 의하여 조회 시 120초 동안은 캐싱된 데이터를 반환하기 때문에 조회 요청으로부터 로그가 찍히지 않습니다.
[ @CachePut ]
- create 메서드에 @CachePut을 추가하기
// #result.id: create()를 통하여 반환하는 타입(ItemDto)의 id 값
@CachePut(cacheNames = "itemCache", key = "#result.id")
public ItemDto create(ItemDto dto) {
    return ItemDto.fromEntity(itemRepository.save(Item.builder()
            .name(dto.getName())
            .description(dto.getDescription())
            .price(dto.getPrice())
            .build()));
}- @CachePut는 메서드를 항상 실행하고, 결과를 캐싱합니다.
- 생성, 또는 수정에 대해서 적용하면 Write Through 전략처럼 동작합니다.
- Write Through 전략: 데이터를 작성할때 항상 캐시에 작성하고, 원본에도 작성하는 전략입니다.
- 캐시의 데이터 상태는 항상 최신 데이터임이 보장임이 보장됩니다.
- 자주 사용하지 않는 데이터도 캐시에 중복해서 작성하기 때문에, 시간이 오래 걸립니다.
[ 생성 요청 보내기 ]
- Postman을 사용하여 생성 요청 보내기

[ 로그 확인 ]
Write Through 전략 처럼 동작함으로 3번의 생성 요청에 대하여 SQL Query(insert)를 3번 보여줍니다.
- 생성 요청 3번 = SQL Query(insert) 3번 동작
Hibernate: insert into item (description,name,price,id) values (?,?,?,default)
Hibernate: insert into item (description,name,price,id) values (?,?,?,default)
Hibernate: insert into item (description,name,price,id) values (?,?,?,default)
[ 동작 순서 ]
readAll 메서드를 실행시키고 ( 120초간 Cache Aside 방식의 캐싱된 데이터를 반환 ), create메서드를 실행시킨다면 @CachePut에 의한 SQL Query(insert)는 로그가 찍히지만, readAll 조회 시 Cache Aside 방식에 의해 캐시에 데이터가 추가되지 않는 모습을 볼 수 있습니다.
즉, readAll 조회 시 120초간 create메서드를 통하여 데이터를 추가하여도 readAll 호출 시 데이터가 캐시에 갱신되지 않는 모습을 볼 수 있었습니다 (Cache Aside)
그렇다면 이 문제를 어떻게 해결할 수 있을까요? 🤔 / @CacheEvict을 사용하여 해결해 보도록 합시다.
[ @CacheEvict ]
- update 메서드에 @CachePut, @CacheEvict 추가하기
@CachePut(cacheNames = "itemCache", key = "args[0]")
@CacheEvict(cacheNames = "itemAllCache", allEntries = true)
public ItemDto update(Long id, ItemDto dto) {
    Item item = itemRepository.findById(id)
            .orElseThrow(() -> new ResponseStatusException(HttpStatus.NOT_FOUND));
    item.setName(dto.getName());
    item.setDescription(dto.getDescription());
    item.setPrice(dto.getPrice());
    return ItemDto.fromEntity(itemRepository.save(item));
}- Evict라는 말에서 유추 가능하듯, @CacheEvict는 주어진 정보를 바탕으로 저장된 캐시를 지워줍니다.
- @CachePut은 Write Through 전략에 의해 캐시와 DB에 수정된 값을 저장해 줍니다.
[ 동작 순서 ]
[ @CachePut ] / [ 동작 순서 ] 에서는 readAll 조회 시 120초간 create메서드를 통하여 데이터를 추가하여도 readAll 호출 시 데이터가 캐시에 갱신되지 않는 모습을 볼 수 있었습니다
- readAll 메서드를 실행: 데이터 조회 ( Duration 120 )
- update 메서드를 실행: 데이터 수정
- @CacheEvict: 저장된 캐시 삭제 (저장된 캐시의 readAll 삭제)
- @CachePut: Write Through 전략을 통해 수정된 데이터 캐싱
- readAll 메서드 호출: 수정된 데이터 갱신
- 정리: readAll 의 Duration 120 초가 지나지 않았지만 update 메서드 호출 시 @CacheEvict에 의해 readAll 캐시가 삭제되고, @CachePut에 의해 수정된 데이터가 캐싱 된다. 이후 다시 readAll 메서드를 호출하면 수정된 데이터가 갱신 되어 있는 것을 볼 수 있다. 즉, 120초가 지나지 않아도 update 메서드를 사용하여 데이터를 수정하고, readAll 메서드를 다시 실행시키면 데이터가 캐시에 갱신되어 있는 모습을 볼 수 있다.
@Cacheable, @CachePut, @CacheEvict 어노테이션의 사용해 보고 데이터를 동작해 보며 동작하는 방법과 순서를 알아보았다.
글로써 설명하기 제일 어려운 파트였던 것 같다. 꼭 노션의 코드와 함께 보도록 하자!
'해피 코딩 > Spring' 카테고리의 다른 글
| RabbitMQ 실습하기 (0) | 2024.08.16 |
|---|---|
| Layered Architecture Pattern? 그게 뭔데! (0) | 2024.08.15 |
| [MSA] API 게이트웨이 Spring Cloud Gateway (0) | 2024.08.05 |
| [MSA] 로드 밸런싱 Ribbon (0) | 2024.08.04 |
| [MSA] 서비스 디스커버리 Eureka (1) | 2024.08.04 |


